The process of taking audio
from an Audio CD is called Ripping, dMC contains a fully
featured CD ripper, to start it select: Start >> Programs
>> dBpowerAMP Music Converter and run dMC Audio CD Input:
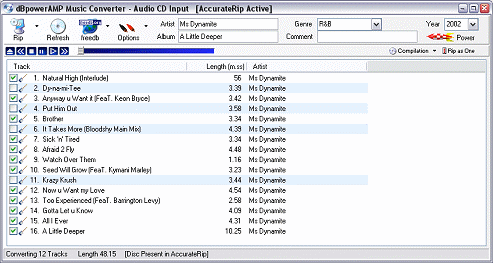
Before inserting
an Audio CD, connect to the Internet and the track titles will
be auto-completed from freedb's database when the CD is
inserted. At this stage do
not worry if your CD Input program is not identical to the
one above, this is explained later.
Tracks with a green tick will be ripped, toggle the ticks on
and off by clicking on them. Pressing Options (button rather than menu):
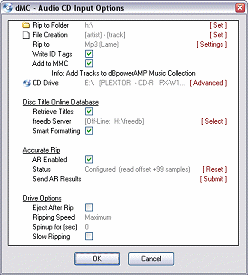
Set Rip to
Folder to where audio files should be saved, File
Creation determines how the files are named: to store
your audio in folders with artist and album, set it to: [artist]\[album]\[track number xx] [artist] - [track].
Finally Rip to sets the type of compression used -
initially Wave and Mp3 can be chosen. Change
the compression settings for the selected compression type
by clicking Settings. New compression types can be
added by selecting (from the main page):
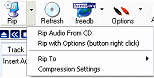
Rip Menu
>> Rip To >> Install New Codec... and follow
instructions presented, mp4, wma & ogg can all be added.
Ready to Rip?
click Rip and the CD will be recorded. Detailed help
on
Audio CD Ripping.
The process of
converting files from one format to another is called
transcoding, generally speaking it is not a good idea to
transcode from lossy to lossy format (mp3, wma, ogg are lossy
formats) as quality is lost during each conversion. Having
said that, if there is a good reason to convert such as the
audio format is not supported in a player, or you wish to
use a lower bit rate (creating a smaller file, of a lower
audio quality) then by all means transcode, if you have the
option though re-rip from the original CD. One last point,
if a 128Kbps mp3 file is converted to a 192Kbps mp3, the
192Kbps file is not of any higher quality - once quality is
lost, it is gone forever.
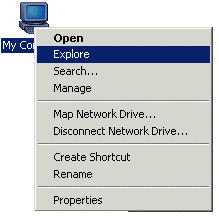
It is very easy
to convert audio files, right click on My Computer
and select Explore:
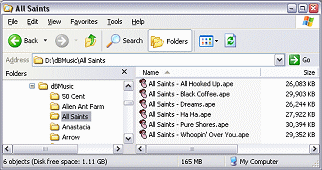
Now find the
folder where your audio files reside:
right click on
one of the files and select Convert To:
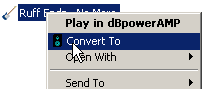
and dMCs
conversion page is displayed:
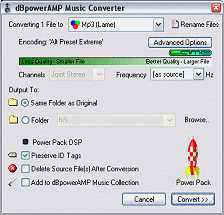
The destination
audio format is selected at the top (Mp3 (Lame) in
this example), quarter of the page below this contains
compression settings which change depending upon which codec
is selected. Output To states where the new converted
file will be stored. Begin a conversion by selecting Convert
>>.
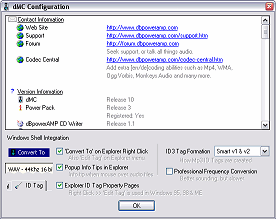
Extra
compression Codecs can be installed from [Codec
Central]. Detailed help on Converting Audio Files.
. |
Main Index
| Audio CD Ripping >>